Sunday 26 March 2017

'Elegance' Inspirational Card For The Ribbon Girl

Hello, lovely blogger friend's.
I hope you are well.
Did you remember to put your clocks forward one hour?
More daylight for crafting! yay! Lol!!!

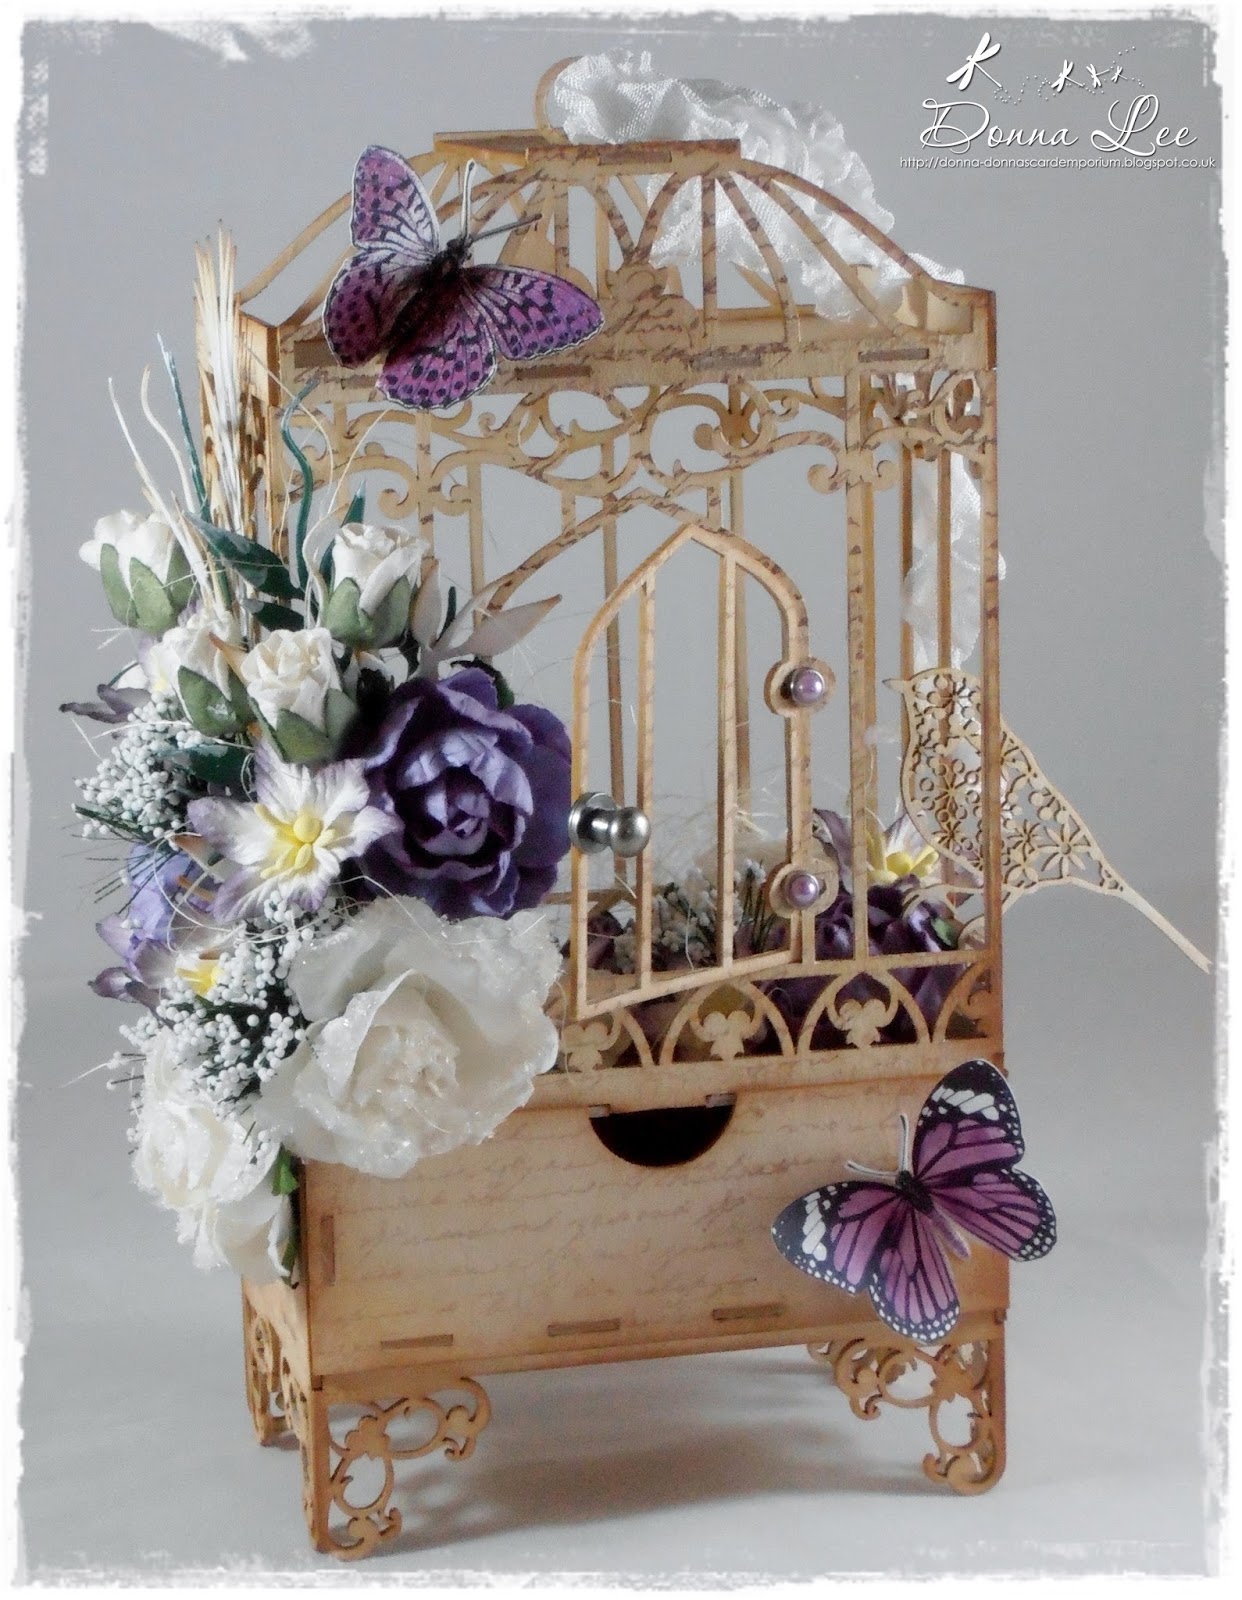
So. I'm here again to share another card that I have made using some gorgeous Pink products from The Ribbon Girl online store.
I have used another of the stunning images from Pion 'Paris Flea Market' and called her Elegance.


For the shape of my card I used GoKreate large frame frilly #10 and Craft & You 'Vintage Time' 6 x 6 Paper stack.
Other dies used are La La Land cherry blossom branches, Joy Crafts Billes flourishes, Spellbinders floral oval and Magnolia Doohickey bloomy tag.
I inked the die cuts and papers with Tim Holtz Vintage photo distress ink.
Here is a list of the gorgeous products that I have used on my card from 
The Ribbon Girl online store.
Click onto the links below to take you directly to the products;


A close look at the flower arrangement's and pretty hand tied bow.


A close look at the image.
I have stamped either side of the image using an IndigoBlu stamp and adhered a length of 3mm white pearl bead string round the outside.


Inside the card is decorated with 'Vintage Time' papers and the smallest of a GoKreate large frame frilly #10 die cut.

I hope you like what you see?

There is still plenty of time to enter our current Anything Goes - Use Any Image challenge which ends on Saturday April 1st, 9pm UK time. 
There are 3 wonderful prizes up for grabs for 3 randomly drawn winners!
More details can be found HERE

I am entering my card into the following super challenge's

Thank you for stopping by to visit today and huge thanks for the lovely comments that you so kindly take the time to leave.
I appreciate every single one of them.

Crafty hugs
Donna xx


Tuesday 21 March 2017

Wycinanka Birdhouse Inspiration For The Ribbon Girl

Hello, lovely blogger friend's.
I hope you are well?
I'm stopping by today to share a birdhouse that I have created using some of the gorgeous products from The Ribbon Girl online store.
Links to the products used can be found at the end of this post.

The Wycinanka Anemone 3D birdhouse comes in kit form from Love To Craft & Create
Here is what I created.


The chipboard pieces come in a pack so it's better to familiarise yourself with how to piece it together first.
I used the pieces as templates to cut out Galeria 'As If In A Dream' Retro 12 x 12 paper pad and adhered the paper to the pieces with tacky glue.
I inked the edges of the  pieces with Tim Holtz Vintage photo distress ink and assembled the birdhouse with tacky glue.


For the alternating roof pieces I used a Martha Stewart daisy border punch and strips of Galeria paper and adhered 2 layers of 25mm Ivory frilled lace to either side.
I adhered a length 4mm pearl Ivory trim along the top of the roof.
I created fascia's with 16mm Fleur Ivory guipure lace and embellished the centre with a bark heart, a wooden heart button and a pink fabric daisy with a 3mm pink pearl adhered to the centre.


An angled view of the birdhouse.


I used some strands of natural sisal underneath the flowers.
The Wycinanka chipboard bird was sent to me from my special friend.

I hope you like my creation?
Here is a list of the products that I used from The Ribbon Girl online store

I am entering my creation into the following super challenges;


Thank you for stopping by to visit today and huge thanks for all the lovely comments.

Crafty hugs
Donna xx


Sunday 19 March 2017

March Anything Goes - Any Image Challenge At The Ribbon Girl

Hello, lovely blogger friend's.
I hope you are well?
Today see's the start of a new challenge over on The Ribbon Girl challenge blog.
Our challenge theme for the next 2 weeks is.........
ANYTHING GOES - USE ANY IMAGE
There are 3 wonderful prizes up for grabs!
You can find out more at the end of my post.

I have made my Mum her Mother's day card using one of the stunning images from 
Pion 'Paris Flea Market'


For the shape of my card I have used GoKreate large frame frilly #2 and Maja Design 
'Summer Time' papers.
Other dies used are; Marianne Design Anja's Vintage decoration and Ivy circle.
Spellbinders floral oval and heart lattice, Magnolia Doohickey bloomy tag and peony leaves.
I have inked the die cuts with Tim Holtz Vintage photo distress ink.

Here is a list of the gorgeous products from The Ribbon Girl online store that I have used.
Just click onto the links below to take you directly to the products;
Maja Design 'Summer Time' 6 x 6 Paper Stack
Pion Images 'Paris Flea Market' 12 x 12 PD1621F
55mm 'Monique' White Guipure Lace25mm pink Mermaid RibbonFB 10mm White Square Pearl TrimScrapiniec Chipboard Lace Doily BorderPink Lily Assortment Pk Of 425mm Pale Pink Open Roses20mm Ivory Open RosesPink/White Beaded Stamens50cm x 80cm White Cheesecloth3mm White Pearl Bead String3mm White s/a Pearl Flatbacks5 Metre Bundle Natural Hemp twine5 Metres Pink Tulip Seam BindingDiamante Heart Top Loop Charm & Filigree Heart Charm Bronze/Brass Colour


Here is a closer look at my floral arrangements.
I love the new selection of lilies.
I hung the filigree heart charm with natural hemp twine and placed it underneath my arrangement.


A closer look at the image.
I stamped either side of the image using an IndigoBlu stamp and sprinkled a little shabby white embossing enamel around the inside.
I adhered a length of 3mm white pearl bead string around the outside of the image and used glamour dust to add sparkle to the beautiful lady's head scarf and rose.


Inside the card is decorated with design paper and the smallest of a GoKreate large frame frilly #2 die cut.

I hope you like my card?
we would love for you to come along and join in with our current challenge which will run until 
Saturday April 1st, 9pm UK time.

Here are the 3 wonderful prizes up for grabs for 3 randomly picked winners!

1st prize; £10 voucher for Lili Of The Valley


2nd prize; maja Design 'Life By The Sea' 6 x6 Paper stack


3rd Prize; is from Marianne Design


If it's inspiration you are looking for then why not pop over HERE where my teamies have designed some gorgeous creations.

I am entering my card into the following super challenge;

Thanks for stopping by to visit today and thanks for the lovely comments that you so kindly take the time to leave.

Enjoy the week ahead
Crafty hugs
Donna xx


Sunday 5 March 2017

Me And My Snowman - New Challenge At Lovely Haenglar Or Sweet Magnolia And A DT CALL!!!

hello. lovely blogger friend's.
I hope you are well?
Today see's a new month long challenge at Lovely Haenglar or Sweet magnolia
Before I tell you what this months challenge is, we are super excited to tell that we are having a DT call. We are looking for 4 crafter's to join us. The team are very friendly, helpful and lovely and we are always there for each other.

The requirements are;
One card per month
Leave comments on our entries with the number you are assigned.
You must have an active blog and a Facebook account would be desirable.
Be reliable and on time with your creations.

If you would like to join us just add DT after your name or you can email Gina at the following address; gina@badhouse.co.uk
Put DT call in the subject and please include a link to your blog.

So on to ur challenge theme which is.....................ANYTHING GOES
Our wonderful sponsor is Wild Orchid Crafts

I have made my 1st Christmas card of 2017.
Your probably thinking er! A Christmas card in March, but I need to get organised early! Although I don't know how long it will last 😁

I used Me and My Snowman from Magnolia Aspen Holidays 2016 Collection.
The image is stamped with Memento rich cocoa ink onto Bristol board extra smooth cardstock and cut around using an oval template.
I have coloured the image with Prismacolor & Polychromos pencils.
I have matted the finished image onto a Spellbinders floral oval.


For the shape of my card I used GoKreate large frame frilly#2 and Maja Design 'A Gift For You' underneath the Christmas tree 12 x 12 sheet.
Other dies used are; Marianne Design Anja's Vintage decoration and Ivy circle.
Sizzix 'on the edge' snow flurries and holiday greens. Joy Crafts Ice crystal circle and Billes flourishes and build a snowman from Magnolia Doohickey club vol 12.
I inked the die cuts with Tim Holtz Vintage photo distress ink.


A close look at the floral arrangements and the snowman.
I coated the arrangements with Snow - Tex.
The lantern is Wycinanka.
I coated the snowman with glamour dust and adhered a piece of black card behind his head so that his mouth and eyes were visible.
I coloured his nose and arms with Polychromos pencils and added 3D gloss to his nose.


A close look at Tilda with her snowman.
I used a snowflake stamp to stamp around the outside of the image and sprinkled shabby white embossing enamel around the inside.
I adhered a length of 2mm white pearl string around the outside of the image and created the snow balls with Snow - Tex.
I used Wink of Stella clear glitter pen on the snowman and used 3D gloss on his nose.
On the ground I used glamour dust.
I dotted Tilda's cheeks with a white gelly roll pen.


Inside the card is decorated with design papers and the smallest of a GoKreate large frame frilly #2 die cut.

I hope you like my card?

We would love for you to come and join in with our new Anything Goes challenge which ends on Friday March 31st.
If you are looking for some inspiration then why not pop over HERE and take a peek at the gorgeous designs that my teamies have created.

I am entering the following super challenge's;
(Die cuts, lace, shaped card, chipboard Magnolia stamp & pearls)


Thanks for stopping by to visit today and big thanks for all the lovely comments that you so kindly take the time to leave for me to read.

Have a great week ahead.
Crafty Hugs
Donna xx


Thursday 2 March 2017

Wycinanka Anemone 3D Birdcage With Drawer

Hello, lovely blogger friend's.
I hope you are well?
It's March already and yesterday was the 1st day of Spring so I wanted to make something springlike.
A couple of months ago I received my subscription copy of Simply Cards & Papercraft Issue 157. Whilst browsing through the magazine I came across a step-by-step guide on how to create a stunning shabby chic-style birdcage by a super talented lady called Ingrid Vichova
I have been in contact with Ingrid, and she is going to do a tutorial on how she made her birdcage when she finds the time.
The Wycinanka Anemone 3D Birdcage with a Drawer is available to purchase from
Monika. The store owner has some gorgeous die-cut chipboard kits and lots of other beautiful   crafting supplies for you to browse through.

Here is my birdcage
I went for a Vintage style rather than a shabby-chic style.


The chipboard pieces come in a pack so it's best to familiarise yourself with how you are going to assemble the birdcage.
I mixed a little water with white Gesso and coated the pieces on both sides with a dry brush and allowed them to dry naturally.
I then rubbed over the pieces front and back with a Tim Holtz ink blending tool and 
Vintage photo distress ink.
I used Imagination Crafts Art Stamp Vintage Scripture and Memento rich cocoa ink to stamp all of the pieces and assembled the birdcage with a light layer of Anita's tacky glue.
I affixed 5mm lilac pearl brads to the door to represent hinges and used a Tim Holtz 
Idea-ology hitch fastener for the handle.


To decorate my birdcage inside and out I used Sisal, Joycrafts 40mm white artificial roses, 30mm Purple English roses, 2-tone purple lilies, Vintage Purple 20mm open roses, white flower meadow spray and 20mm white Tuscany rosebuds.
I die cut the foliage using Joycrafts Billes flourishes and Sizzix holiday greens and placed them between the arrangements.
The purple butterflies are cut out from a sheet of UHK Gallery purple & green butterflies available to buy from Love To Craft & Create
The Wycinanka lacy bird that I have perched onto the side of the birdcage with tacky glue was sent to me from my special crafting friend.
I tied a length of white seam binding through the loop at the top of the birdcage.


A side view of the birdcage.


A close look at the flower arrangements side and front.
I used glossy accents and twinklets diamond dust on the edges of the 40mm artifical roses to give them some texture and sparkle.

I hope you like my birdcage?
Huge thanks to Ingrid for the step-by-step guide and for the tips and advice.
I'm sure I drove her mad!

I am entering my birdcage into the following super challenges


Thanks for stopping by to visit today and huge thanks for all the lovely comments that you so kindly take the time for me to read.

Crafty hugs
Donna xx