Thursday 30 January 2014

Cosy Christmas Tilda & Apple Basket.

Hello, Crafty bloggers.
Welcome to my blog and  a big thank you to all my new followers.
I hope you are well?
I am feeling sad. My eleven year old Pug named George is very poorly.
To take my mind of things I have made a shaped Christmas card. My second one this year. Lol!!!
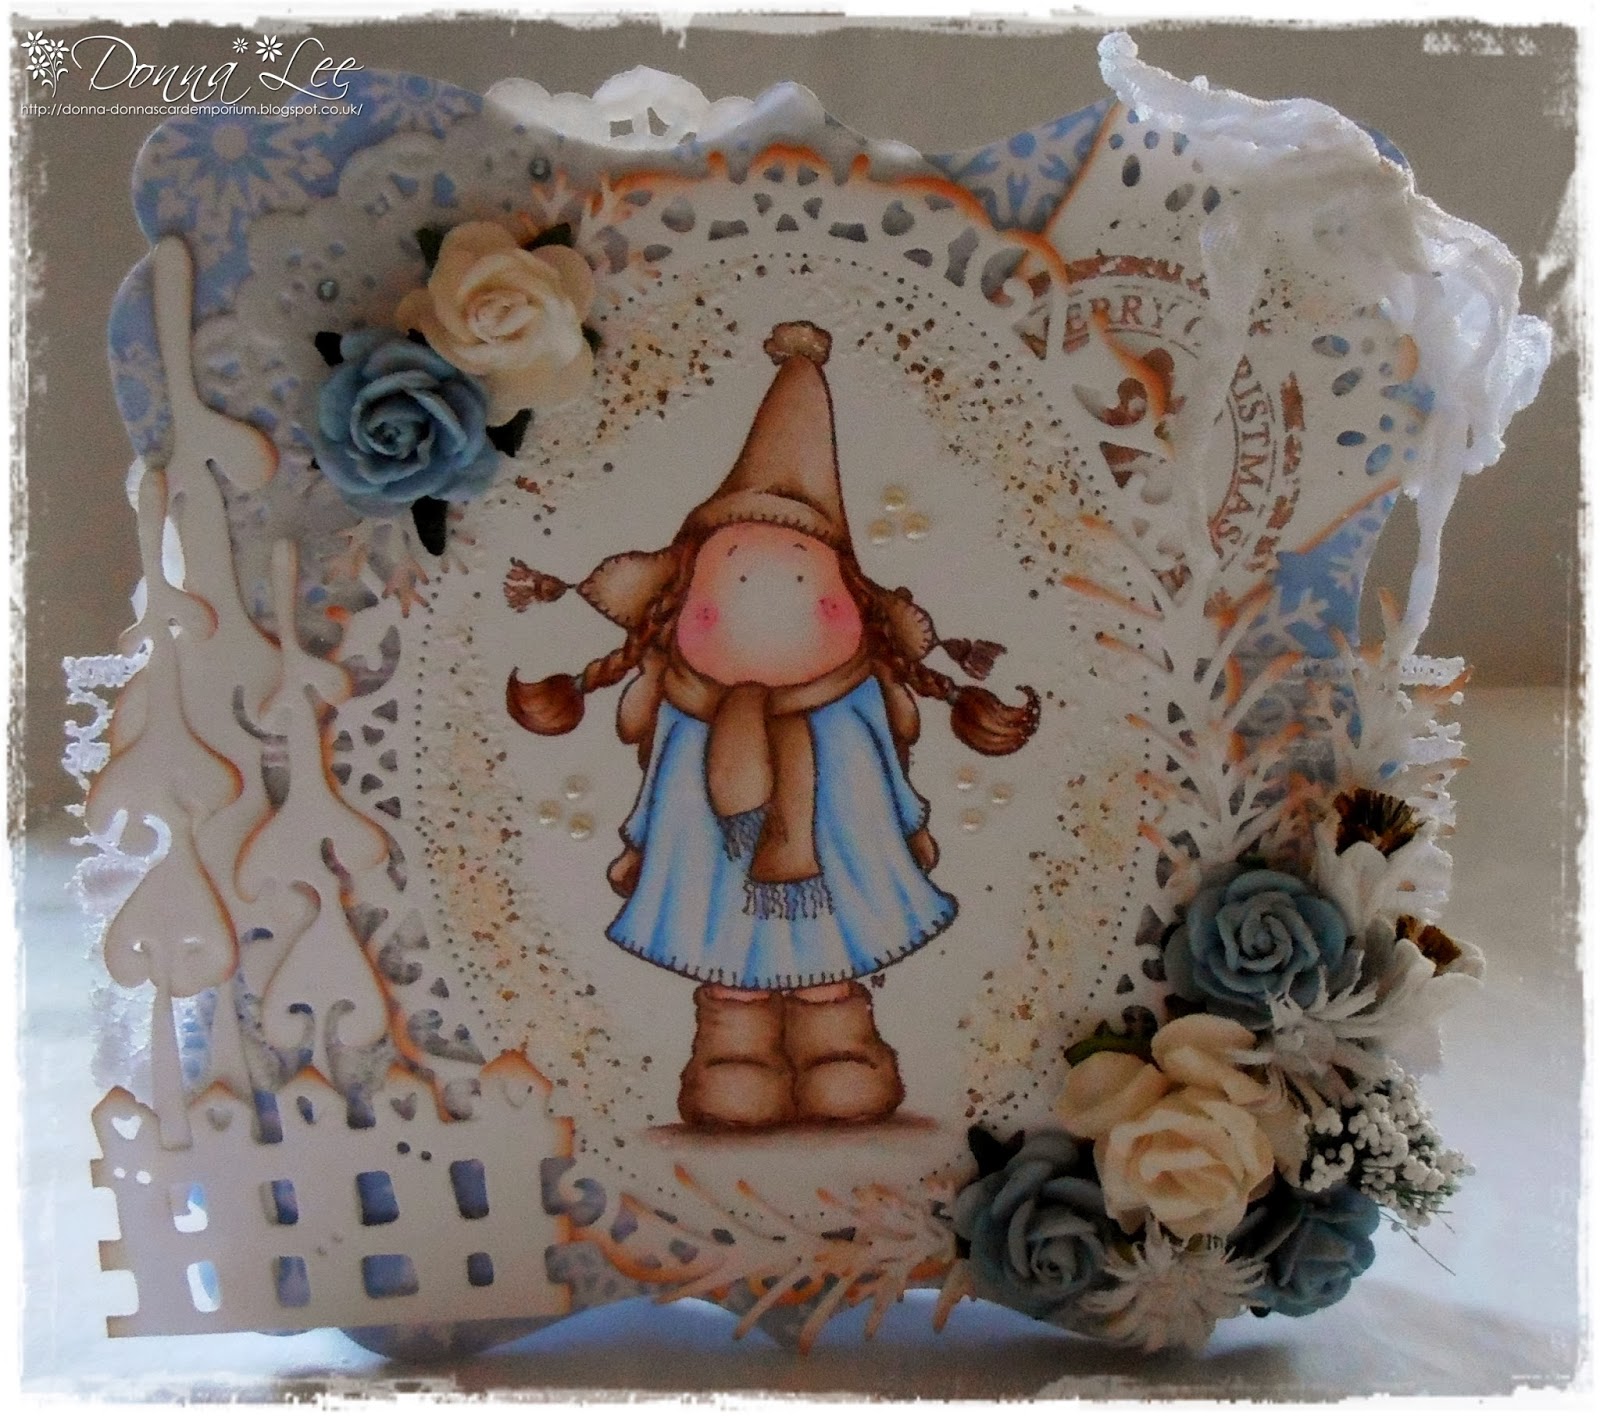
I have chosen Cosy Christmas Tilda and masked Cosy Christmas Apple Basket from the Winter Wonderland Collection 2013.


I have die cut a Spellbinders Nestibilites Opulent Oval with Neenah cardstock and stamped Cosy Christmas Tilda and Cosy Christmas Apple Basket from Sirstampalot onto the oval with Memento rich cocoa ink.
I have coloured the images with Prismacolor and Polychromos pencils.
For the shaped card I have used 300gsm white Conqueror card and GoKreate large frames frilly #2.
The papers are Maja Design Vntage Summer Basics from Live & Love Crafts. 
The doily is Cheery Lynn Nautical Wheeler. I have inked around the edge with Tim Holtz tea dye distress ink.
The pretty lace is from Ebay and can be found  HERE. 
I have used Doohickey dies. Spruce firs and lovely fence. I have inked the edges of the dies with tea dye distress ink and coated both with Snow-Tex from Live & Love Crafts. 
I stamped Magnolia Vintage Merry Christmas Postmark from Sirstampalot with Memento rich cocoa ink, cut around it and adhered it to the removable centre piece of the Nautical Wheeler doily.
I have also inked around the edges of both the sentiment and centre piece with tea dye distress ink.
The wooden stars on the bottom of the card are from Live & Love Crafts. 


I have used a selection of flowers for the arrangement.
They are blue Kort & godt rolled roses and chrysanthemums from The Ribbon Girl. 
A 25mm ivory wild rose from Wild Orchid Crafts and marshmallow frosted berries from
For the foliage between the arrangement I have used Cheery Lynn pine branches and Martha Stewart woodland branches. I inked the edges of the branches with tea dye distress ink.
I have adhered a 5mm white pearl to the centre of each of the rolled roses.


Here is a close up of Cosy Christmas Tilda with Apple Basket.
Do you think those apples look good enough to eat?
I sprinkled Frantage shabby white embossing enamel from  Live & Love Crafts and adhered a few 2mm white pearls around the image. I have used ArtDeco glamour dust on Tilda's pom-pom and dotted Tilda's cheeks with a Inkssentials opaque white pen.


Inside the card is decorated with Maja Design paper and a Spellbinders Opulent Oval.


I hope you like what you see?


I am entering my creation into the following super challenges:


Thank you for stopping by to visit today and huge thanks for all the lovely comments.
They make me very happy.


Crafty hugs.
Donna xx


Thursday 23 January 2014

London Tilda And Some Great News!

Hello, crafty bloggers.
Firstly, I am so excited as I have been chosen as new DT member for Marvelous Magnolia. 
I am really looking forward to joining Rina and the other DT ladies.
I will be posting my first creation as DT member here on my blog on the 6th February 2014.
Yippee! Lol!!!

On to today's creation...........I have made another shaped card. I love making them. Can you tell?
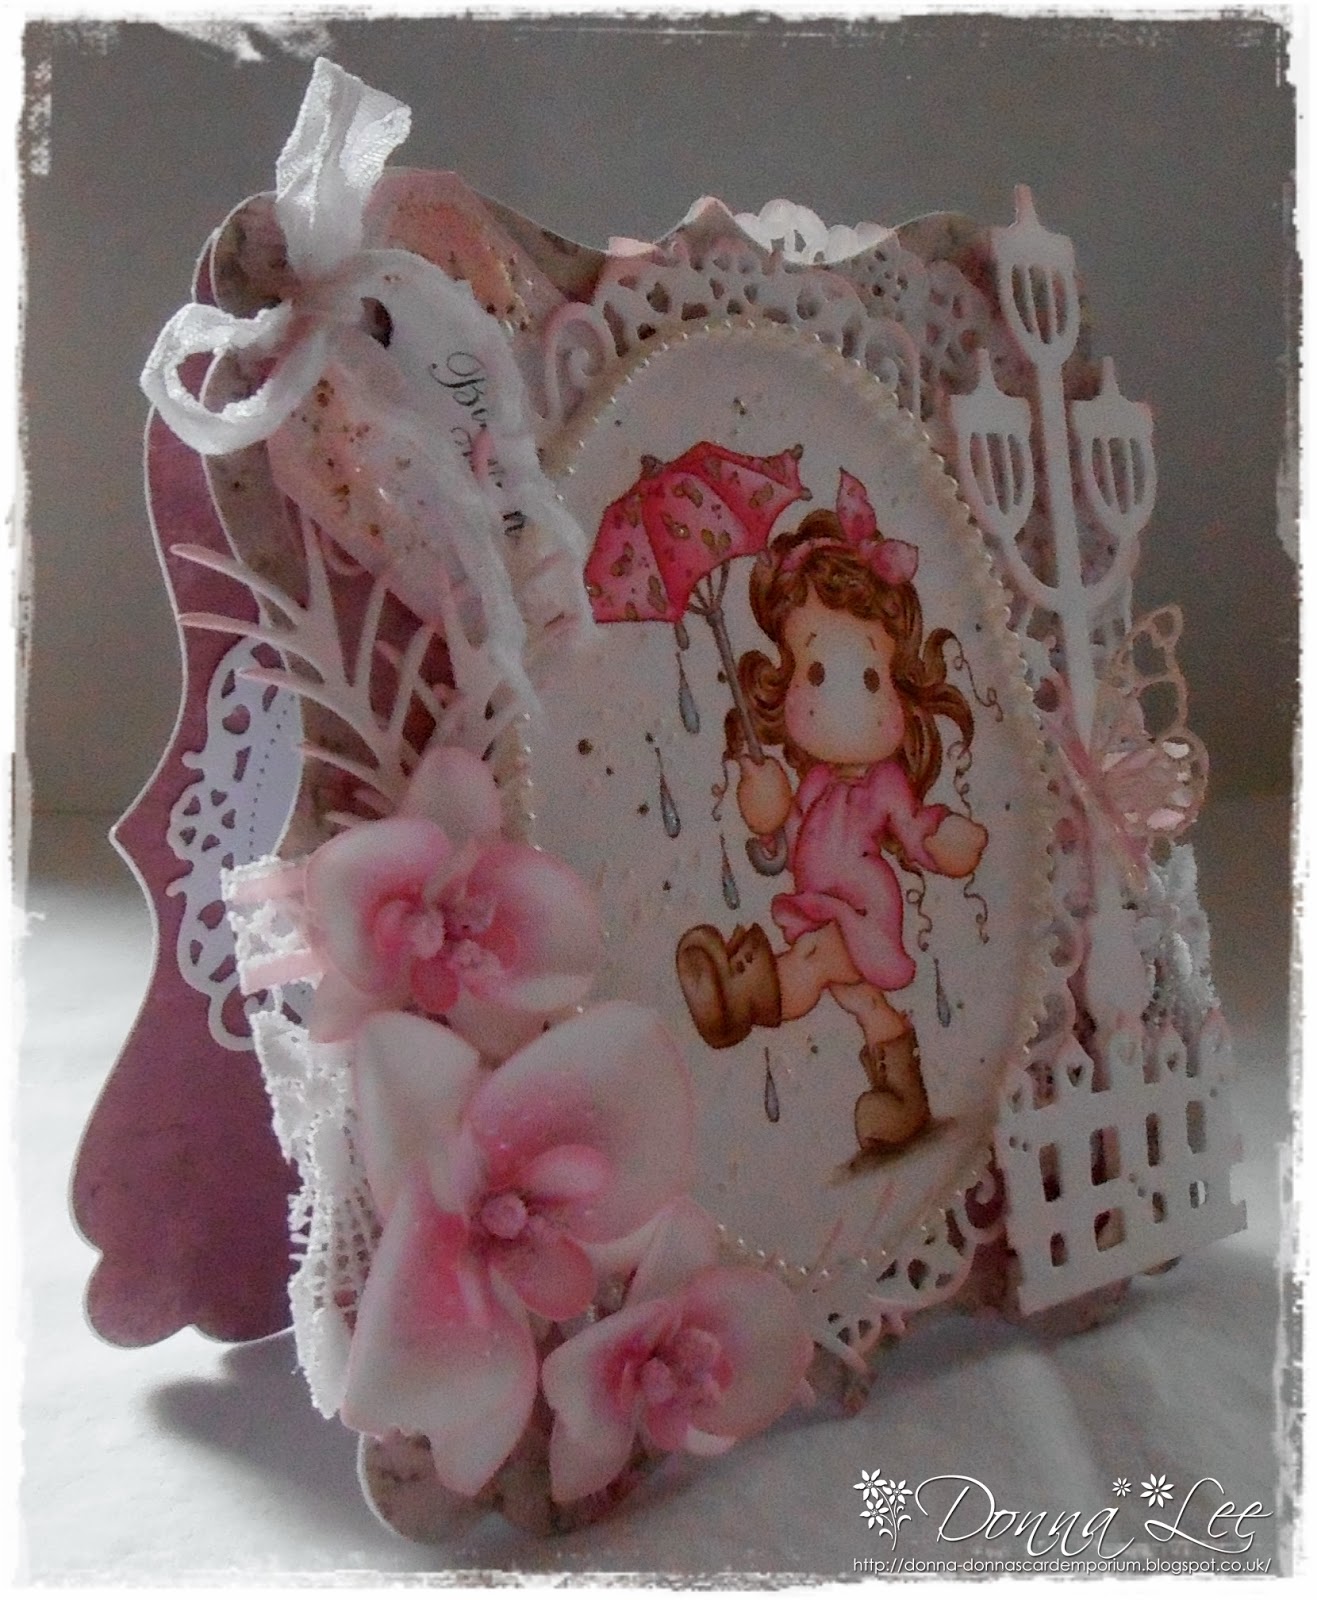
This is a commissioned Birthday card. I have chosen London Tilda from the Little London Collection 2013.


For the shaped card I have used 300gsm white Conqueror card and GoKreate large frames frilly #2 from Cuttingedgecrafts. 
The pretty papers are Maja Design Vintage Summer Basics from Live & Love Crafts. 
The doily and lovely lace are from Ebay. You can find the lace HERE. 
I inked around the edges of the doily with Tim Holtz spun sugar distress ink and adhered a strip of pink satin edged ribbon across the top of the lace.
The lamp post die cut is Joy Crafts and the lovely fence die cut is Magnolia Doohickey.
I have inked the edges of both the lamp post and lovely fence with spun sugar distress ink.
The Pippi butterfly on the lamp post is Memory Box.
I have frantaged the butterfly with shabby pink embossing enamel and coloured the centre with a pink Polychromos pencil.

I die cut a Spellbinders floral oval with Neenah cardstock and stamped London Tilda onto it with Memento rich cocoa ink.
I coloured Tilda with Prismacolor and Polychromos pencils and inked the edges of the floral oval with spun sugar distress ink.
I have adhered a string of white pearls from Live & Love Crafts around the inside of the frame.


Here is the card with the tag removed.
The sentiment is Papermania occassions. I have sprinked around the sentiment with Frantage shabby pink embossing enamel from Live & Love Craftsand made it into a gift tag by punching a hole in one end and tying a bow through it with white shabby seam binding also from Live & Love Crafts. 
The filigree corner is La-La-Land. I have inked the edges with spun sugar distress ink.


I found a fabulous tutorial in Magnolia Ink N0 4 2013 on how to make the Doohickey orchids.
My super bloggy friend sent me the Doohickey orchid die cuts
To create 1 orchid I cut off the pistol of the flower. I inked the edges of the orchid with spun sugar distress ink. I then coloured the pistol and the centre of the orchid with a pink Polychromos pencil and added some Ranger white perfect pearls to the centre of the flower.
I bent the orchid part with the two round leaves and pushed the leaves of the other one towards each other. I pierced a hole through the centre of the pistol. I coloured three white stamens from
Wild Orchid Crafts with a carnation pink Promarker and threaded them through the pistol, coloured flower and leaves.
Ta Dah!!! 
Thank you to Monique for her Magnolia Ink magazine tutorial.

I die cut three Cheery Lynn pine branches and inked the edges with spun sugar distress ink placing them between the orchids.


Inside the card is decorated with Maja Design Vintage Summer Basics paper and a Spellbinders floral oval.


A close up picture of London Tilda.
I have sprinkled frantage shabby white embossing enamel from Live & Love Crafts around Tilda and added ArtDeco glamour dust to the raindrops.
I have dotted Tilda's cheeks with an Inkssentials opaque white pen.


I hope you like my creation?


I am entering my creation into the following super challenges:


I have another 2 commissioned cards to make. Mother's day cards. So I am off to do some colouring.

Thank you for stopping by to visit and big thanks for all the lovely comments that I recieve.

Crafty hugs.
Donna xx


Thursday 16 January 2014

Christmas Tilda.

Good afternoon, crafty bloggers.
My super bloggy friend introduced me to Magnolia stamps just before Christmas 2012.
From the very first time I coloured one I fell in love with them.
I have wanted to colour one of the very first Tilda's for some time now so I treated myself to Christmas Tilda. I bought her from Sirstampalot. 
I have made another shaped card featuring Christmas tilda.
I hope you like my first Christmas card of 2014? Lol!!!


I have used Neenah cardstock to cut a Spellbimders floral oval and stamped Christmas Tilda onto it with Memento rich cocoa ink.
I have coloured Tilda with Prismcolor and Polychromos pencils.
I sprinkled some Frantage shabby white embossing enamel from Live & Love Crafts around the coloured image and inked the edges of the floral oval with Tim Holtz tea dye distress ink.
For the shaped card I have used  300gsm white Conqueror card and GoKreate large frame frilly #2 from Cuttingedgecrafts. 
The papers are called Frosty Christmas from Lili Of The Valley. 
The white doily and gorgeous lace are both from Ebay. You can find the lace HERE. 
 I have adhered tiny blue rhinestones onto the doily.
I have used quite a few Doohickey dies. They are lovely fence, spruce firs and bloomy tag.
The bloomy tag was a surprise Christmas gift from my super bloggy friend.
I have inked around the edges of all the Doohickey dies with Tim Holtz tea dye distress ink.


I have taken a photo of the card with the bloomy tag removed.
I stamped  Magnolia Vintage Merry Christmas Postmark from Sirstampalot onto the tag with Memento toffee crunch ink and sprinkled shabby white embossing enamel around the sentiment.
I have tied a bow with white shabby seam binding from Live & Love Crafts through the tag's eyelet.
The filigree corner is la-la-land and I have inked the edges with tea dye distress ink.


For the flower arrangement I have used a white 25mm wild rose and 20mm baby blue roses from
White Kort & Godt chrysanthemums from The Ribbon Girl. 
White flower spray and white poppies from Live & Love Crafts. 
For the foliage between the flower arrangement I have used Cheery Lynn pine branches and Martha Stewart woodland branches.
I have inked the edges of the branches with tea dye distress ink.


Inside the card is decorated with Frosty Christmas paper and a Spellbinders floral oval. I inked the edges of the floral oval with tea dye distress ink.


 A close up of adorable Christmas Tilda.
I used ArtDeco glamour dust on  her pom pom and adhered 2mm white pearls around her.


I am entering my creation into the following super challenges;


Thanks for stopping by to visit today and big thanks for all your lovely comments.

Crafty hugs.
Donna xx


Thursday 9 January 2014

Prima Ballerina Tilda.

Good afternoon, crafty bloggers.
My super bloggy friend bought me Prima Ballerina Tilda for Christmas.
I have made a shaped card with her.
Isn't she adorable? I love her.


I have stamped Prima Ballerina Tilda from the new Little Moscow Circus Collection 2013 onto Neenah cardstock with Memento rich cocoa ink and coloured her with 
Prismacolor and Polychromos pencils.
For the shaped card I have used  300gsm white Conqueror card and GoKreate large frames frilly #2 from Cuttingedgecrafts. 
The pretty papers are Maja Design "Vintage Autumn Basics" from Live & Love Crafts. 
The white doily is from Ebay I have adhered 2mm white pearls to the top of the doily.
The gorgeous lace is also from Ebay. You can find it HERE 
I have used lots of Doohickey dies. They are big and small vintage daisies, twisted swirl and
 lovely fence.
I have inked the edges of all the Doohickey dies with Tim Holtz tea dye distress ink.
The foliage in between the daisies are Cheery Lynn pine branches and Martha Stewart woodland branches. I have also inked the edges of the branches with tea dye distress ink.
The ballerina charm is from The Ribbon Girl 
I have attached silver plated curb chain and rings to hang the ballerina charm from the back of the brad that is in the centre of the daisy..
The butterflies are Memory Box Pippi. I have Frantaged the butterflies with shabby blue embossing enamel from Live & Love Crafts and coloured their centres with a powdwr blue Promarker.
The sentiment is Papermania


Here is a close up of the Doohickey daisies.
After I had inked the edges I gently squeezed the petals to make them raised.
I assembled the large daisy with an ivory brad and the smaller daisies I adhered together and placed a 2mm white pearl in the centre.


A close up of Prima Ballerina Tilda.
I surrounded Tilda with shabby white embossing enamel from Live & Love Crafts and also added some 2mm white pearls.
I added ArtDeco glamour dust to Tilda's shoes and bottom of her dress.
I have adhered tiny blue rhinestones in Tilda's hair.
I dotted Tilda's cheeks with a Inkssentials opaque white pen.


Inside the card is decorated.


I hope you like what you see?


I am entering my card into the following super challenges:


Thanks for stopping by to visit today and huge thanks for all the lovely comments.
Here's to lots more crafting in 2014!

Crafty hugs
Donna x


Thursday 2 January 2014

Tilda In Evening Dress.

Happy New Year crafty blogger's.
I hope you all had a great Christmas?
 I have made a shaped card featuring Tilda In Evening Dress.
 
This is my first commissioned card for 2014.


I have used Neenah cardstock to die cut a Spellbinders opulent oval and stamped Tilda In Evening dress from the new Little Circus Moscow collection 2013 with memento rich cocoa ink onto it. I have coloured Tilda with Prismacolor and Polychromos pencils.
I inked the edges of the opulent oval with Tim Holtz spun sugar distress ink.
I used pink card to cut a Spellbinders floral oval and adhered the opulent oval onto it. I have inked around the edges of the floral oval with spun sugar distress ink and added white 2mm pearls to it.
 
I have made the shaped card with GoKreate frilly frames #2 and 300gsm white Conqueror card.
The pretty papers are Maja Design Sofiero from Crafts U Love.
The white doily and gorgeous white lace are from Ebay.
I have added pink 5mm pearls on the doily and the white vintage metal corner.
The white vintage corner is from Live & Love Crafts.
The bark stars were sent to my from my super bloggy friend. I believe she bought them from
I have added Frantage shabby white embossing enamel onto the stars.
The Frantage is also from Live & Love crafts.
I have computer generated the sentiment in Word using Harrington Font 14 and cut around it with a smaller Spellbinders opulent oval. I sprinked some shabby white embossing enamel around the sentiment and inked the edges with spun sugar distress ink.
 
 
The flower arrangement consists of white chrysanthemums, pale pnk 20mm roses and white Kort & Godt chrysanthemums from The Ribbon Girl. Pink poppies and white frosted berries from
In between the arrangement I have placed Cheery Lynn pine branches and Martha Stewart
woodland branches.
I inked the edges of the pine branches with spun sugar distress ink.
 
 
A close up of Tilda In Evening Dress.
I sprinkled some Frantage shabby pink embossing enamel from Live & Love Crafts around the image and added some Ranger white liquid pearls for the champagne bubbles.
I have adhered a few 2mm white pearls around Tilda and dotted her cheeks with a Inkssentials opaque white pen.
 
 
Inside the card is decorated with Maja Design paper and a Spellbinders floral oval.


I hope you like my creation?
 
 
I am entering my card into the following super challenges:


I have my fingers crossed that this year that I will be making a lot more commissioned cards!?!?
 
 
Thank you for stopping by to visit today and big thanks for all your lovely comments.
 
Crafty hugs
Donna xx